Today I did a presentation to the Big Cypress Chapter (my chapter) of the Villages Quilt Guild. The topic was on Quilters Making Note Cards. This presentation is intended for the non card maker/scrapbooker. These are simple cards primarily using "stuff" found in a quilters working area. The only items that may not generally be found in a quilters work area would be card stock and double sided tape.
The various items that MAY be needed, depending on the card type chosen, will be
a. Card Stock/packaged blank cards (always purchased using a 40/50% coupon)
b. Scissors (both paper and fabric)
c. Iron and Ironing surface
d. Cutting Mat and rulers
e. Rotary cutter (both paper and fabric)
f. Heat and Bond
g. Double Sided Tape (always purchased using a 40/50% coupon)
h. Sewing Machine
i. Sharpie or other fabric marking pen
j. Pencil
k. Fabric Scraps
l. paper or fabric for simple background (Scraps, wrapping paper, card stock, scrapbook
m. a printer/copier
The first 4 cards are made without using a sewing machine
The first one was originally made with the help of kids. Designs from coloring books are traced onto Heat and Bond, ironed onto fabric, cut out and ironed onto a card. The fun part was using a sharpie to draw on the running stitch around all of the edges.
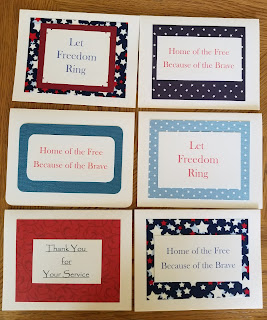
Next up are cards made with various phrases printed out from the computer and then layered onto a card using double sided tape.

You will notice a heavy use of RWB in these card examples because the end goal of the presentation was to have the group whip up some cards for Operation Shoebox.
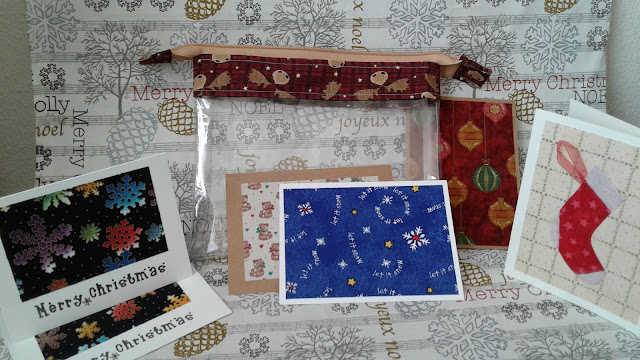
Number 3 is a card made to match a gift. I made a quilt using this fabric, photocopied it, fussy cut / trimmed the photo copy and taped it to a card then made a matching gift tag with another scrap.

These same cards can be made by applying heat and bond to the fabric and ironing it to the card stock. These were not part of the presentation but cards that fit this category from my past
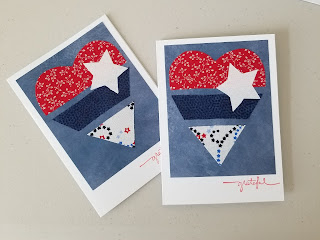
Card 4 is made using a shrunk down (I love my printer) quilt block pattern, this one is from CELEBRATION TIME a quilt pattern by Carol over at Just Let Me Quilt. I traced the pattern onto Heat and Bond , ironed it to some scraps, ironed the pieces to scrap book paper and layered it onto a note card.

Since this card will be the card I hope the group would work on I drew out lots of the pieces on paper and then photo copied it onto heat and bond by taping it to card stock and running it through my copier.
This card will be an ongoing item for Operation Shoebox.
Next came the cards using my sewing machine. I used regular thread and whatever needle happened to be in my machine.
These cards are raw edge applique done on fabric then attached to the note card
A simple bow sewn onto fabric and then directly sewn onto the card

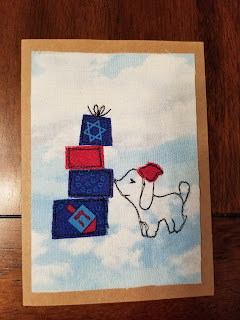
and a Hanukkah card sewn on fabric and taped to the card. Both of these patterns are from Minki Kim's new book Diary in Stitches
This card is also from last year. I designed it myself after doing the 2 cards above and did all of the stitching directly on the card.
Another super scrap buster are these note cards from the book in the photo by Amanda Jean Nyberg of crazymomquilts
My final category are cards made using my embroidery machine. I have vowed to myself that I will get my monies worth out of this machine and that it will not sit around collecting dust.
So here are 3 examples of what you can whip up using an embroidery machine and a 4 inch hoop.
The first card is from Nancy embroideryitdesigns It is a design actually created for a card. I stitched it and then used watercolor pencils to highlight.
Card #2 was just an applique design I down loaded because I thought it would make another great card for Operation Shoebox I just skipped the applique parts for the cards.
I had a slight problem with these pieces that I discovered after sewing out 4 of them. They were just a tad big for what I wanted to do. Simple fix,
just make a bigger card.
The pattern can be found at Embroidery-Boutique
And the final cards for the presentation are Red Work designs I downloaded from Designs by JuJu
I hope this was a stop that has given you something to think about and act on now that you see the simplicity of the process. If you have any questions just leave it in the comment section and I'll be happy to get back to you.
Also if you try the note making process I'd love to see what you come up with. Thanks for stopping by.
Also if you try the note making process I'd love to see what you come up with. Thanks for stopping by.


Very clever. I love the simple designs of these! Very doable.
ReplyDeleteYou gave such a great presentation, Selina! You offered lots of examples, and different options for making them. No one left our meeting without thinking about what their own homemade card(s) might look like. Thank you for taking the time to put all this together, and for this post reminding us about all the possibilities! Good stuff, for sure.
ReplyDeleteThank you for all of the examples. I am eager to make some. When you embroider directly on card stock do you hoop the card stock?
ReplyDeleteLovely blog. Thanks for sharing with us.This is so useful.
ReplyDeleteYou continue to amaze me with the new things you try. Quilting, embroidery, and cards...you're very well rounded in crafting! Thanks for all the fun card ideas!
ReplyDeleteAfter seeing the items you made with your embroidery machine, I ordered the redwork snowmen from JuJu. Hopefully, I can come up with some projects as interesting as yours.
ReplyDeleteThhis is a great blog
ReplyDelete