Sunday, September 30, 2012

Fall Stitchery and then some

I made this lovely pin cushion this week using the pattern designed by Kaaren Johnston of http://thepaintedquilt.blogspot.com/2012/09/first-friday-freebie-31-with-tutorial.html
 
 
Her stitcherie patterns are wonderful and she shares many of them freely.  This pattern came with a super simple tutorial.  I really think I made a great copy of her work with the exception of the pins.  She had wonderful artsy pins and I have basic yellow heads.

 
The pattern fully surrounds the piece.  I really enjoyed making this piece.


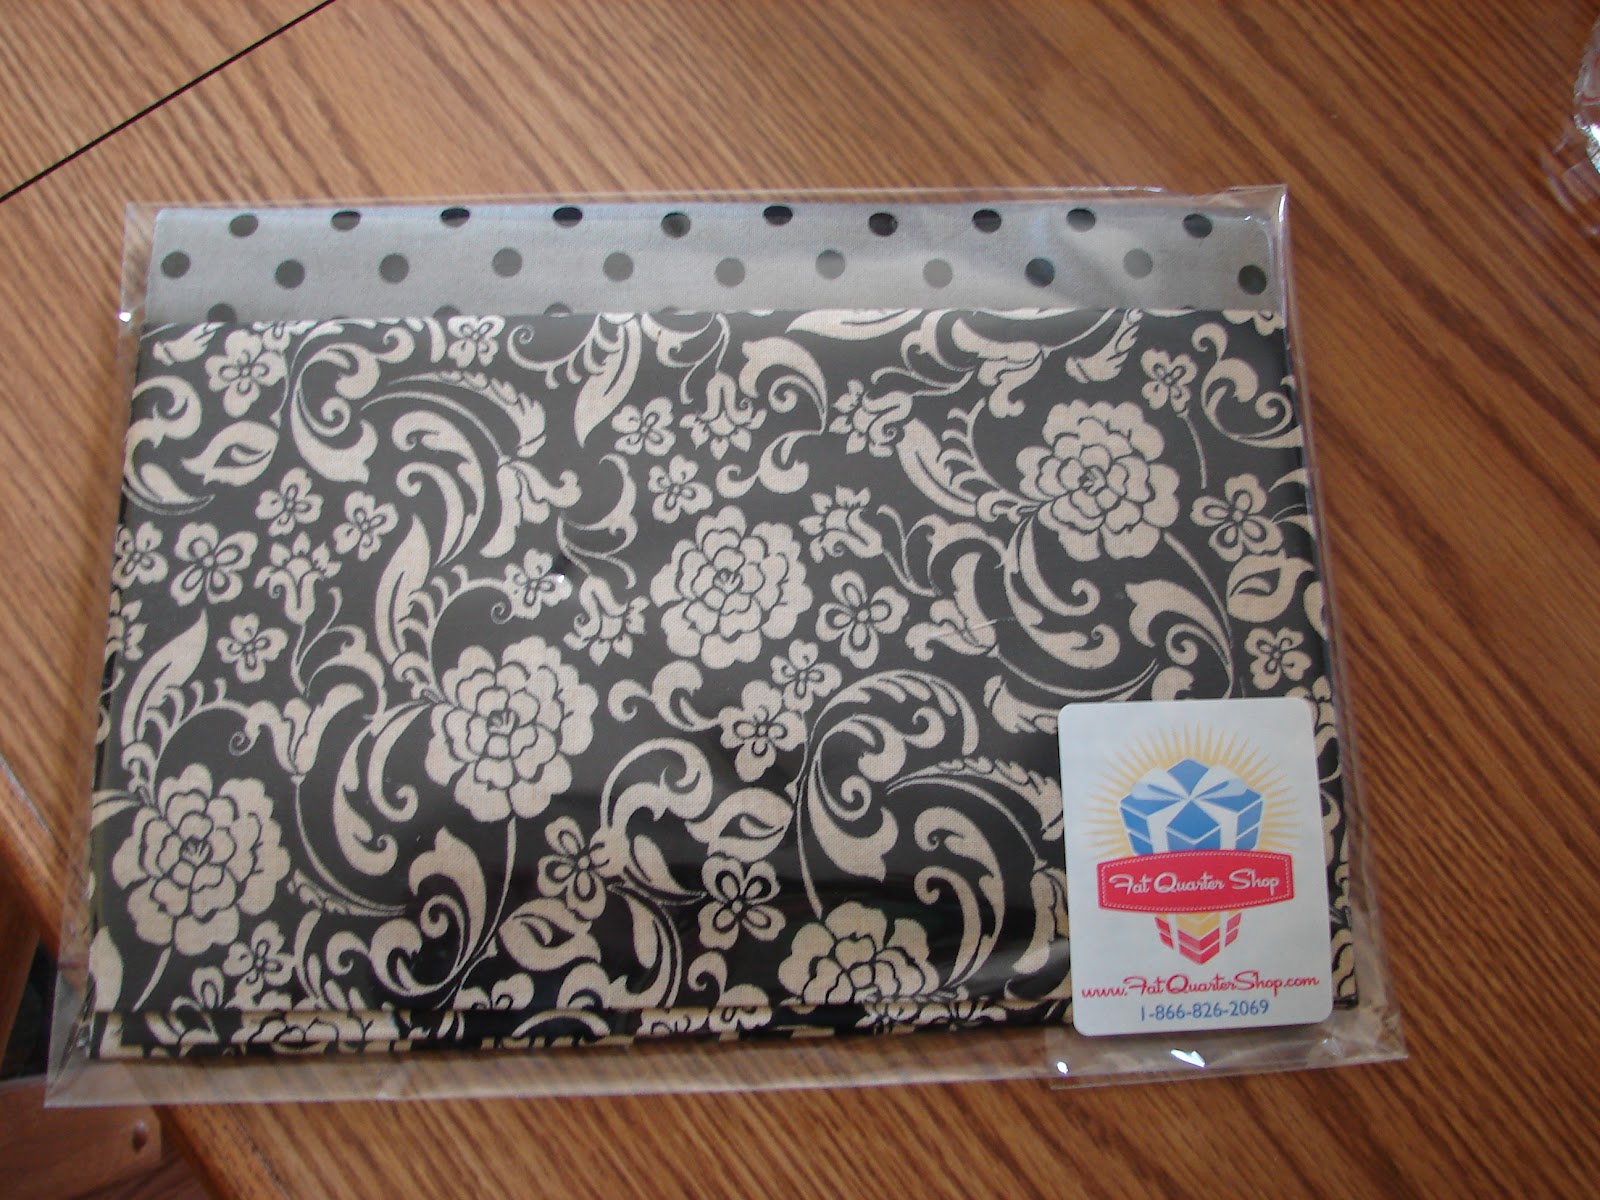
Now this lovely package represents my win from Jane of   janesquilting.blogspot.com .  It was her giveaway during the Dots on Dots Blog Hop.  The package contains 2 half yard cuts of my choice from the Fat Quarter Shop.

Speaking of Blog Hops, tomorrow starts the Leafs Me Happy Hop.   I hop this Wednesday and my giveaway will be the Pin Cushion pictured above.  For more information you can click on the button on the left.  Here is the official list.  So stop in and help celebrate fall with all of these terrific quilters.

Monday
1
Pam Pereira – on That Other Blog
Tuesday
2
Jessisca – on That Other Blog
Wednesday 3
Nancy Seitz – on That Other Blog
Thursday
4
Deborah Brightwell – on That Other Blog
Friday
5
Frances Campbell – on That Other Blog
Monday
8
Kathy Gentry – on That Other Blog
Tuesday
9
Wednesday
10
See you back here on Wednesday.

Saturday, September 22, 2012

trying something new

This is where it began.  This is my current key ring.  If you don't recognize it, it is a puppy collar.  I've been using it for years. Way before the new wrist key holders became the in thing.


Today is my friend J (in Fl.) birthday. I need to specify because I also have a friend J in NJ and they both follow my blog and they both would think this was about them and one would be let down.  I make both of these friends their birthday gifts most years.  Generally they get the Guinea Pig version of what I make.


I googled wrist key holders and got quite the selection of places to go and versions to try. Really could have skipped that part.  It is after all just a loop holding the hardware.  I did pick up the hardware at JoAnnes with a coupon. If you followed the Dots on Dots blog hop you would see that I still had some Dottie fabric laying about that needed a new home.


Well the key holder looked a little lame as a gift so I decided to try my hand at a purse, mainly because I signed up for the UR priceless blog hop, see the top button on the right, and I've been wanting to try one more and more each day.  I googled this too.  Many many to choose from and combine.  This is a combine version.  It is sewn together not glued. I got this hardware at JoAnnes too.  I did the sewn on version mainly because I didn't have glue.  Nice to have had the option with the particular frame I purchased. Apparently not all frames come with the holes.


Here is a picture of the inside.  Next time I will need to rethink the color of the peral cotton I use.  Didn't thing the stitches would show or I would have used red.  Oh look more dots.

These were quite easy to do.  I was surprised actually at how easy the purse was to make. A little more time consuming than a zipper purse but not as difficult.  Maybe less time consuming if you use the glue method.  Will need to try that next ( see that J in NJ) just need to pick up another frame.

Overall I am pleased with the experiment and I'm sure J will also be pleased especially if I ever get it in the mail.

This effort makes waiting for the Hop purse instructions a bit easier.  I understand there are a couple of spots still open if you are interested in joining the UR Priceless Hop. Enjoy the week.

Wednesday, September 12, 2012

Dots on Dots - My Turn

First the Thank You's.  Thanks you so much to Corrie at Quilt Taffy for hosting the latest SewWeQuilt Blog Hop! And thanks to Madame Samm for being Madame Samm and coming up with yet another wonderful way to make us "Dottie"
 
I thought I took a picture of my beginnings of this adventure.  I had pulled ALL of my Dottie fabrics and loaded them on the ironing board but  for the picture buy now I can't locate it. 
 
So on to my first blocks.  I actually made 4 of these 10 1/2 inch 9 patch blocks but found them lacking.


I then went on to 12 1/2 inch blocks starting with hearts.  I made 3 of the large version and was bored with them so I swithched out to the 4,   6 inch blocks that went together to the correct size. Really liked that effect.  Please note that even my background fabrics are Dottie. I apparently like Dots way more than I knew.


Then came the Stars, because what would one of my projects be if it didn't contain this star either in the project itself or made from the left overs.  I had this fabric for years and had no idea what to do with it. I made 4 stars in total.  Love how they turned out.


Next up I made trees. Love them too.  All 4 of them.


By know I had a plan. I decided I needed a queen size quilt and what better way to get it made in a reasonable amount of time than rolling it into this hop. I had never made a ROW type quilt before but now I had 3 rows of 4, 12 inch blocks already done.
 
So  I needed at least one more row.  I always loved 3 D bow ties.  They are so much easier to make in jumbo 12 1/2 inch size.


So to make this quilt queen sized I just added really wide sashing and even wider Borders.  The quilt is just going to be a fun quilt for my spare bed.

 
Tried to get a picture outside with MJ holding it but even his 6'3 couldn't manage it for a clear picture.

 
The sashing is peach with tiney white polka dots.  The Border is green with red polka dots. Not one fabric used without dots.


This is it spread out on my King size bed. I'm really happy with how it turned out.  With the exception of the border all of the dots came from my stash.  I did get the border and backing at 50% off, which is as close as one can get to using their stash.  That's my story and I'm sticking to it.
 
The backing is also dottie.  When I get it all done I'll post it.
 
So that's it for this gal for this HOP.  I had a great time and I hope you enjoyed your stop here.  Please hop on over to the visit the rest of todays talented participants listed below
September 12th
selinaquilts  (me)


Sunday, September 9, 2012

Dump Quilt

This is how it began.  A bag full of the left overs from my 4 most recent quilts.


This was a great adventure started by Beth at http://lovelaughquilt.blogspot.com/.  She threw out that she would have a Link in for a Dump and Sew.   I had never looked at my scraps from this perspective before.  Just dump out a bag of scraps and start sewing.  No rhyme, no reason and no unnecessary cutting.


 OK that was a stressful way to begin. But I got over it.
 
This is what I came up with.  It is currently measuring up to about 40 by 50.  Here it is spread out on my king size bed.

 
The rain stopped and I was able to get a much more clear picture of my masterpiece. 
 
I worked this up over about a week of free moments.  No thinking really speeds up the process.  I didn't give color any attention at all.  My cutting was limited to squaring up.  Looking at this picture I can see where some of my shapes were a bit lopsided  which is why I needed to square up finished sections. 
 
The right edge that is blowing in the wind was one piece left over from the back of my stars quilt. I didn't need to sew it together  just added it on.  There is a chunk in the middle that came from the pieced back of my black and white 1600 quilt.
 
All in all I would recommend this process as a fun use of sewing time.  I still have some scraps left from this dump so I will be working on piecing some sort of back to match this top.   Will post about that adventure another day.
 
Thanks Beth I had fun.

Monday, September 3, 2012

Quilts 1 & 2 back from the quilter

Quilt 3 was done last week because I did my own quilting.  I only do long straight lines.  Quilts 1 & 2 needed a different type of quilting.
 
I sent them out to Sarah Russett of Sweet Potata Quilts.  She turned them around in a week for me.

 
I'm trying for a close up of the beautiful quilting, front and back.


The star quilt has beautiful FMQ stars scattered about.  Very cool look.


The lighting could have been  better but it is very cloudy here today so I was forced to take pictures in the hall.  These will be delivered tomorrow to their new family.

I'm now off to work on my dump quilt for Beth's Linky party next week.
http://lovelaughquilt.blogspot.com/2012/08/dump-and-sew.html
I had lots of scraps in a new bag which I just collected over the last 4 weeks.  

I made the 3 quilts for MJ's co workers kids and a quilt for the Dots on Dots Blog Hop at
http://www.sewwequilt.com//   which is also next week.  My day is September 12.  I made quite a lot of scraps doing these projects.  I am very excited to see what I can whip together using them.

Wednesday, August 29, 2012

3rd one done

 
In my previous post I explained about the need for 3 quilts for a friend who's family was burned out of their home last month.  Last week I got 2 tops done and sent to the quilter for her magic touch.  They are due back tomorrow for binding.   The 3rd quilt is a modified 1600 jelly roll quilt.  I used
 2 1/2 in red, green and yellow squares between each of the strips. I love how it turned out.  I did the quilting on this one myself. I do straight lines really well.

 
I even love the back.  I got the binding  done in one long sitting last night.  I'm seriously thinking of making this one (much larger) for me.  At this rate we should be able to deliver these early next week.
 

Thursday, August 23, 2012

Another busy week

Where to begin….. I had great plans for myself for last weekend’s crafting.  I was going to put the binding on my king size swoon quilt and maybe do some blocks for the Dot Blog along.  Dinner conversation Friday evening put an end to that.  One of MJ’s coworkers and her family had been burned out of their home. Thankfully they are all OK. 

So what does any self respecting quilter do?  Why they commit to making 3 quilts for the kids in the family of course.  I only had one tiny problem and that was what to make.  Now I’m really good at baby quilts and my adult quilts aren’t bad but for tweens and teens, not really my thing.  There are none in my life at this point so I had to rough it.  The only info MJ had was that there were 2 girls and 1 boy in the tween to young teen age range.

I tackled the boy first and went to my old faithful stars.  I was surprised that I actually had enough dark blue fabrics without flowers and swirls to do the stars.


Then it was off to the girls.  One of my favorite quilts is this one I can’t remember what it’s name is but I have posted about it in the past with a link to the tutorial.  If you need it let me know and I’ll dig it out for you. 


Anyway, the center squares are lovely fine line flowers in several bold colors.  So I went with the bold colors for the outside of the blocks and ended up second guessing myself trying to figure out if it was too childish.  I have it on good authority from one of my coworkers with a tween that this was good and not childish and would be OK.

I put in most of Saturday and Sunday and after work on Monday on them.  Tuesday was a vacation day and I managed to get the backs done and got them into the mail to the quilter by noon.  

Got home from the post office and started this posting only to have Blogger not accept my pictures.  It didn’t matter what I did or what source I used I couldn’t upload a picture. Wasted a lot of time trying and decided to get to work on the third quilt.  I determined that a Jelly Roll 1600  quilt would be good and I could quilt that one myself in a reasonable amount of time.

Tried posting again last night and the same thing.  Bloggers ears should have been ringing.  MJ came out to see what my problem was and to show me just how much better on the computer he was and he gave it a try.  Well in the end it seems it isn’t blogger. MJ had no problem uploading pictures onto a posting from his laptop it just seems to be my laptop that is having issues.  I’m doing this posting from work on my lunch hour. He won’t let me touch his 2 week old lap top,  I don’t have a good track record with electronic equipment. 

I guess I'll just stick to quilting.

Saturday, August 11, 2012

Busy Week

I’ve had a pretty productive sewing week.  1st up I have a friend in SC who had a heart valve replacement.  She’s a quilter and I didn’t think she needed a quilt but she did need something more than a get well card. I did want to send something quilty.  I decided a mug rug would be perfect.  My favorite part of Mug Rugs is that mine are from my head and heart not a pattern. 


I thought this conveyed my feelings exactly.


Next up was this toddler play blanket.  My friend J told me about this play blanket she saw earlier this summer.  It’s like a picnic blanket for a little one to play on. It has a draw string around it so you can pull the string and end up with a tote for the stuff the child was playing with.   The idea has been bubbling in the back of my head since mid July and this is my version based on her description. 


This is a pretty good size, it's on a king size bed for the picture.


I headed to JoAnns with the intent to buy home dec fabric with a coupon.  Home dec is pretty wide and I didn’t want to have a seam on the playing surface.  This being an experiment I also didn’t want to spend much money.  I don’t have any toddlers in my life and I had no real home intended for this when it was done.


What I found when I got to JoAnns was that they had the NO SEW fleece kits at 50% off , soft , large kid friendly and cheap.  What more could a gal ask for. 


Off to sew I go.  I don’t know what shape the original blanket was.  My guess is round because you pulled the string and it made a tote.  Well the fleece  I got was a rectangle so I trimmed  it to an oval.  I didn’t want to give up any play space by trimming to a circle. 


 The kit comes with 2 pieces of coordinating fleece.  Lots of fun kid stuff.  I picked puppies since I still didn’t know If this was going to a girl or a boy.   I measured the circumference of the oval and then I cut pieces from the coordinating fleece fabric for the draw string channel.  I cut the piece 6 ½ inches wide because that was how wide the ruler I was using was.  Very scientific.  

I attached it basically the same way you attach binding so that all the raw edges were covered, except at the opening. 

I then took the dog for a walk.

 Good thing.  While I was out with her and thinking through the next steps I realized I needed two opening for the draw string, one across from the other.   Back home and ripped some to make an additional opening in  the channel.   

The only thing I saw wrong with J’s description of the blanket was the draw string.  I really hate the idea of draw string and children.  My idea for a kind of work around was to make a very thick draw from fleece.  Again I used a 6 ½ inch wide piece of fleece, a couple of inches shorter than the circumference.  Folded it in 4 and stitched it.  It looked like a puffy strap.


This resulted in a rather fat draw “string”.  It also had the advantage of turning the channel into a slightly raised  rim which would in effect keep smaller pieces such as little cars and crayons from rolling out.  


                          This was a 3 hour project start to finish (including the dog’s walk). 


I don't have kids or grand kids so I am using Dog toys to illustrate.


Here it is full of dog toys hanginf from the door frame.


Brought it to work yesterday morning to show it off and immediately had a taker.  Also had a suggestion for an additional use, a gift wrap for baby shower presents. 

 If any of you run with this project I’d love to hear about it and the modifications you make along the way.  This was off the top of my head and really needs a  little tweaking before making another as a gift.  Good luck and have fun with it.